Showing posts with label scrapbook layout. Show all posts

Monday, September 30, 2013

WICKED layout

Hey everyone.  I am back today with a layout. I created this with my Silhouette. It's no secret I love this machine and this layout is the exact reason why...I could never do this on my own! ;)

I spent a LOT of time on the details to this one. I may even frame the left side of it for decor for a while as all my children saw it on my desk and were totally enthralled with it...even my 26 yo son loved it.  The journaling for the layout is under the Tombstone on the right side. You lift the ghost and it's under there.

This layout was created for my daughter because last year when things were tight I didn't have an extra $60 to purchase the costume my daughter wanted for Halloween. Costumes are everything when you live in the Halloween Capital of the world. I threw her costume together for absolutely ZERO dollars from old costumes in the basement and the help of FREECYCLE for the wings.  She was a HIT trick or treating. She felt beautiful and when we got up town there were literally hundreds of those monster costumes walking around.  She was so happy she was original.


I pieced some 6x6 paper for the background on the left side (I am sorry I don't know who made it. I bought a stack pre-cut at my lss) and used a Kerri Bradford background for the right side.

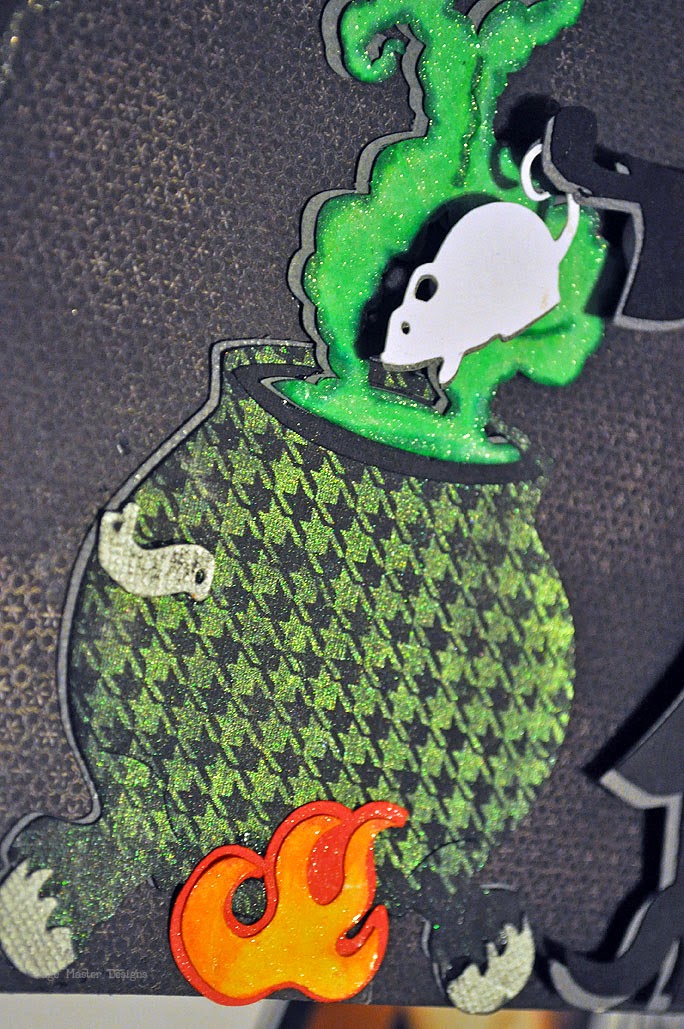
I used my Wink of Stella glitter pen and stickles to make everything shimmer. It really looks so cool in real life. All these files can be found in the Silhouette store.
For the Cauldron I used a Hero Arts stamp and some perfect pearls. I love the effect.  Fire and potion were colored with Tombow Watercolor markers.


If you have questions about any of the cut files I used please don't hesitate to ask. I tried to link them up via the inlinkz tool but it doesn't allow for the images to show. sorry.

Have a fabulously WICKED day!
Michelle


Tuesday, June 11, 2013

Then & Now

Today I am here with a sketch challenge from The Memory Nest.  I was really excited when I saw this sketch. I love this sketch. Then again, I love every sketch that Becky Fleck makes. Her and her Page Maps just rock!!!!

I had this single picture of my 3 youngest together from this past Easter. I really wanted to put it in my book and tell about their relationship. While I didn't add journaling to the front of the layout, I will add a pocket and a letter to the back expressing my feelings to them about how important each one will be the other as they grow older. I do this on a lot of layouts that are in their 8.5x11 books. Those books are more like "letters from mom", things I want to say to them, things I want them to know, things I feel are so important for guiding through this rough and tumble world.  I use their 12x12 books differently.

So because I was putting it in an 8.5x11 album I had to modify the sketch just a little bit. Because the actual sketch didn't call for a journaling spot I jumped at the chance to challenge myself into making it smaller.
Here is what I did with it:


 I stayed pretty true to the sketch. I had a lot of fun playing with Echo Park's new line Here & Now. I thought it worked great with what I wanted to do.

 I cut the large ampersand, arrows, artisan shapes and the notebook paper with my Silhouette Machine. I double layered the ampersand to give it some dimension. I also added some Hero Arts black pearls to it.
For the Arrows I just used the letter stickers to point to them then and them now.
I machine stitched it all together.  The honeycomb paper is from Basic Grey's Fact/Fiction line.

Thanks for stopping by. i hope you will stop by The Memory Nest blog to see what the other girls did and join us in the sketch challenge this month!


Michelle


Tuesday, May 28, 2013

The Funniest Story Ever

Hi everyone!  I am here today with a layout for the color challenge over at The Memory Nest. I was SUPER excited when I saw these colors. I knew instantly what I wanted to use for this challenge...Echo Parks "All About a Boy" designed by Lori Whitlock. It's no secret I am a HUGE fan of Lori's and these papers just make me swoon. I actually think I need to go buy another paper pack...and if you know me...I usually use a line once and get bored with it. Not this one! It's just too fun!

Here are the colors:


I had no idea what I was going to scrapbook and then Wednesday night the best and funniest thing happened while I was out for all of 30 minutes. My boys recounted the story to me and dh when we got in and I have been laughing about it ever since. I even used some quotes from the voice mails I received from my panic stricken son.

While I captured some of the story with the journaling quotes I still needed to tell the whole story. It's a long story and I didn't want to go to 2 pages. The easiest way to do this is to hide the journaling. I trick I learned a long time ago and utitilize it ofen.
That panel on the front with the subway word art is the perfect spot to hide journaling. it lets you get a lot in there. I have two 4x10 journaling spaces in there. I used some old hinges from Making Memories that I had to hold it all together.

The cover of the journaling needed decoration so I used this really cool patterned paper from the kit and cut the design out of my Silhouette. I cut it again out of gray and mounted them together using spray adhesive and then attached it to the front after everything was done.  The gray paper gives it nice dimension and a shadow effect.

 The title for the page was also cut out of some of the patterned paper. I created the title myself in my Silhouette software. I welded it together, cut it out and then edged it with a white gel pen. I also cut it out of gray like the subway art above.  Some of the letter stickers from the kit made a nice finish to the title. I love that hexagon shape.
A close up of that tag strip. the tags are from the Silhouette store. They too are by Echo Park. I just can't get enough of their stuff!  The hahaha is a print and cut from the Silhouette store also. I printed them on photo paper and I use Soft Gloss so they have a nice little sheen to them.

I used border stickers from the kit (starts), I die cut the notebook paper (Kerri Bradford) and used a Lori Whitlock tag that i added a gear sticker to the hole and added another print and cut to that.  The book mark is also cut from my Silhouette and I used a Technique Tuesday stamp with Colorbox White Frost on it. I kind of smeared it so I traced over it with my white gel pen. I like how it looks shadowed.

The date stamp here is from Studio Calico and the arrow is part of the sticker kit. I stamped a Hero Arts telephone on the tag that had the voice mail quote in Soft Stone.  The orange dot paper is Bo Bunny.

I pop dotted some of the tags but not all of them. I also layered each one on gray cardstock like I did all the lettering.

 journaling
journaling

Thanks for stopping by. Be sure to check out what the other girls did over at The Memory Nest. I hope you choose to play along. You don't have to scrapbook...you can make cards too. In fact, I am off to make some boy cards with this paper line.  Have fun!