Showing posts with label Scrapmaster's Paradise. Show all posts

Monday, May 20, 2013

A Perfect Summer Mini Album

Hello! I just want to warn you this is a very long post. ;) I don't know about you but after seeing Echo Park's A Perfect Summer I was so excited to scrapbook summer pages. I was thrilled when I found out it was the paper pack that was going out in the Scrapmaster's Paradise Kit for this month. I knew exactly what I wanted to do with it when it arrived...I wanted to make a mini album. I did incorporate a lot of Echo Park's Hello Summer by Lori Whitlock into it too. The good thing is that Lori designed both lines and the colors worked PERFECTLY together. YAY!

I used an old Basic Grey "Mini" chipboard album that measures 12 x 6. It holds 14 pages plus front and back cover,

I had so many pictures and so many pages to do I wanted to simplify it. I decided to take this album step by step. Here are the steps I followed:

1. Choose photos
2. Make Storyboards in Photoshop Elements for all the photos This is a great way to get a lot of pictures into one album without having to cut all the pictures down and worry about not getting them all the exact same size. I created clipping masks to make it much easier. Here is a great tutorial for those that don't know how to do it.
3. Sketch each layout out. I actually did this as I created the storyboards. It was so much easier to know what I wanted each page to look like with photos as I went along.
4. Cut down 15 pieces of cardstock to 6x12 (just cheap stuff. use it as a base so you can stitch each page without it going through the other side--I didn't add one to the back cover)
5. Cover those pages with the patterned papers you want and then sew them all at once
6. Add photos
7. Embellish

It actually went pretty fast. It did take me two weeks but I was really sick in between it all.

Here is the album:
This is the cover.
 A close up. I did a lot of sewing on this and a lot of pop dots
 Page 1
Journaling. Sticker title is from Echo Park's Sweet Summertime
Just add water sticker is from an old Scenic Route line (I tried to use older product up), banner at top is from Hello Summer by EP
Love the little journaling cards that Lori Whitlock adds to her paper lines. I always pray there is a paper on the other side that I am not too crazy about. ;)

Journaling to above page
Totally love all the letter stickers that came with A Perfect Summer and Hello Summer. A great way to add just a little bit more writing.

A simple sticker can really draw your eye in.

An example of how well as Story Board can work. The top and bottom rows are all the same size. The middle row is smaller, longer photos. Ones that showed what fun they had but not the greatest pictures.
A story board with photos all the same exact size. That sticker sheet got huge use in this book. It's almost all gone. I have enough left for one more layout I want to do. ;)

Dot paper is from Hello Summer as is the bird. Sun is a rub on from a set I picked up years ago.

American Crafts foam letters and a couple Jillibean Soup tags helped this page of pictures I wanted to include but didn't really fit anywhere.

This becomes the title page for the next section of photos which is obviously us at the beach. ;)

A close up. All I did was tear and ink kraft cardstock and added some American Crafts thickers.  All stickers are from The Perfect Summer sticker sheet. Cloud paper is either EP or Jillibean Soup. I forget...I apologize. It's older.

Another story board with different sizes. Stickers are from Hello Summer, paper is from The Perfect Summer, rub ons are Cosmo Cricket. I cut out the "No" pare of the rub-ons and used letter stickers instead.
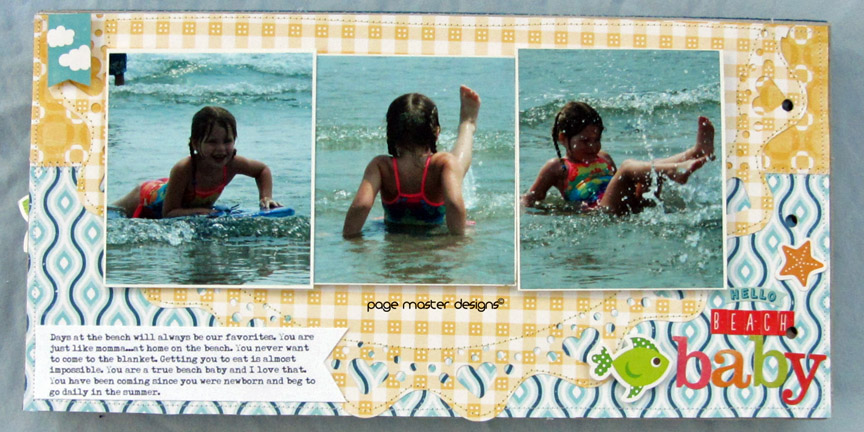
I used the new We R Memory Keepers Lucky 8 Punch to create the large sun (click it and you can see it better). More letter stickers. I think they are my new favorite tool. So fast and easy.

Close up of sticker title

journaling

I added an ice cream sticker over the one on the journaling tag to make it pop more. I had to add some of my handwriting. I try to incorporate it in everything for my kids.


Family get together.

journaling
 More thickers and letter stickers just make for a simplistic yet effective title

While we did a lot more than fish while camping I only had one page left and wanted to at least get it in.

That's all for today.  If you want a kit from Scrapmaster's Paradise head over HERE. You get a heck of a deal for very little money. I ended up with a great album full of memories from one kit!!! 

If you have any questions don't hesitate to ask.

Have a great day.
Michelle

Saturday, May 4, 2013

New Puppy

Hi everyone. Happy NSD. I am scrapbooking today but I first wanted to finish up a card that I created with a new stamp from Scrapmaster's Paradise. I love this little boy and his puppy. He is just sooooo cute. I paired him with Lori Whitlock's A Perfect Summer for Echo Park which was also the paper that came in SP & Co's monthly kit this month. Just a perfect match for this stamp.

I started by stamping the Furever Friends stamp on watercolor paper in Archival ink. I then used my watercolor pencils and waterbrush to color it in.  I layered the EP papers and sewed them with my machine. I cut the scallop banner out of some of the patterned paper and pop dotted that over the  other banners.

For the title I created a custom title for this card in photoshop because my little cousins just got their first puppy and I wanted to personalize the card for them.

I'll be back soon with my NSD projects. What are you working on today?

Michelle

Friday, April 26, 2013

Family is God's Gift

Hello, today I am sharing a card that I made for Scrapmaster's Paradise. I just received the new SP in COLOR chalk inks and couldn't wait to play with them. THEY ARE TO DIE FOR!!! Smooth, beautiful and juicy...just like you like your ink pads to be!

I used the Chevron Chase SP & Co stamp on this layout with an old playing card that Reminisce put out a few years back. I love these cards and I hoard them but I am really trying to use my stash and this one said exactly what I needed it to say.

 Aren't those colors YUMMY??? From the top to the bottom you have Avacado  Green, Aqua Seaglass and Ocean Waves.  I also added the coordinating buttons too.  You get a huge tin of buttons with so much variety for so little money. I HIGHLY ENCOURAGE you to go check it out. She also had twine at a really good price and the twine I used in green matches the Avacado brilliantly.
Here's a close-up of those yummy, yummy buttons.

Here are the direct links: 

Sunday, April 21, 2013

Love u

Hi everyone!  I have a blog post up over at Scrapmaster's Paradise today. Here is a sneak peek

There is a photo tutorial that goes along with it too. I used SP & Co dies to create that little outline around the heart in the Basic Grey Fact/Fiction line.  I hope you stop by to say hello.


Have a GREAT DAY! :)
Michelle

Thursday, April 4, 2013

New Baby Girl

Quick share today. I made this card from some scraps and a sticker sheet from my monthly scrapbooking kit from Scrapmaster's Paradise. It uses the papers from Echo Parks new line Bundle of Joy girl version.


I love using up my scraps!

have a great day! :)

Michelle

Saturday, March 30, 2013

You're Beautiful & You're Mine

Hey everyone, I am here with a scrapbook layout today. I used this month's monthly scrapbook kit from Scrapmaster's Paradise & Company. I love this month's kit. It feautures the Bundle of Joy collection from Echo Park.

 I kept the layout fairly simple. I love the papers and really wanted them to be the shining start of this layout.
 I layered the butterflies with 3 different colors and added foam adhesive in between to give them dimension.
 I used the stickers to create a cute little scene with hearts, owl and butterflies.
 I die cut the titles with my Silhouette. I cut it in both gray and a patterned paper from the collection.
Very simple, easy page. This paper line is absolutely gorgeous in person.

I hope you have a wonderful weekend. All the papers can be found at Scrapmaster's Paradise & Company

Friday, March 22, 2013

You are Fabulous

YAY! It's FRIDAY!!! Sorry for the impromptu break, my laptop had a major crash this week. I just got it back.

So I have a quick card to share. I used Scrapmaster's Paradise & Company's Certified Awesome stamp again but this time I just used a little banner and phrase. I love how versatile this stamp set is. I paired it with some patterned paper's from Echo Park's For the Record 2 by Lori Whitlock. Love these!


I should be receiving my first kit from Scrapmaster's Paradise this weekend and I am hoping to have a fun layout to share with you too. If you have a love of Echo Park you should really check out these kits and her stamps. It just fantastic!!! There are so many great things on the horizon over there!

Have a Fabulous day!!!

Michelle

Saturday, March 9, 2013

SP & Comany Sketch Challenge

Hello again everyone! *If you are here for the Patterned paper challenge please go HERE this is my 2nd post of the night.

This is the 11:00 p.m challenge and it's a SKETCH! This is our sketch for tonight's challenge, it's from one of my older cards:
"

and here is the card that I made for it:

You are
For this card I used the Scrapmaster's Paradise Certified Awesome Set with Matching Die. The dies are new to SP & Company and I absolutely LOVE them. They are open just like the Hero Arts frame cuts, there is not guessing as to where you are cutting, you get a perfect cut every single time.  SP & Company also uses the highest quality photopolymer. The stamps stamp BEAUTIFULLY!!! I highly urge you to go look at her store. Her stamps are really really fun and she is releasing dies to go with lots of them. :)

The challenge is simple. Make a card based as closely or loosely to the sketch as you want. YOU DO NOT HAVE TO USE SP & COMPANY STAMPS. I can't wait to see what you do. Remember to post them over at SP & Company's Facebook page.

Here are the rules:
THE RULES:
Have lots of fun!
Challenge projects must be NEWLY created and follow the challenge prompt.
You DO NOT have to use SP stamps on your projects - anything goes for supplies.
ONE online crop challenge per project, no piling on crop challenges.
You can enter each challenge as many times as you would like.
All entries are due by Monday, March 11th at noon EST.
One winner will be chosen at random from all the challenges for a mystery prize package.
One winner who enters the most challenges will win a mystery prize package.
One winner will be chosen at random from all the comments left on the Online Crop comments on Facebook or on the Online Crop blog posts. This winner will also win a mystery prize package!

See ya on the flip side!

Michelle

SP & CO Patterned Paper Challenge

Hi everyone!!! Welcome! If you are coming from Scrapmaster's Paradises Facebook Page this is the 4:00 p.m challenge. If you are not coming from there I would still love to have you play along and you can find the rest of the challenges and all the fun HERE. There are prizes to be won...and you don't want to miss that do you? YOU DO NOT HAVE TO USE SP & COMPANY STAMPS TO PLAY IN ANY CHALLENGE.

This challenge is about using Patterned paper...now don't be groaning. ;) I am going to show you a very SIMPLE way to get some patterned paper on your cards. It's fun and simple and while I am at it we are going to do a little bit of masking too.

Now because I just found SP & Co and was just put on the Design Team I didn't have any of their stamps when I started this first card. I went to the SP & Company shop and downloaded the free digital images. You can find them HERE

This is Lovely Emma and we are going to create this card with her today:

completed card
This is a very photo heavy post. My tripod is missing a piece so I couldn't video. I apologize.

Step 1: Print digital image out on plain computer paper. You can use Microsoft Word, Powerpoint or Photoshop. Any software that lets you open an image. (if you are stamping, stamp image onto plain computer paper)
step 1

Step 2: Chose 2 patterned papers. They can be scraps. I chose 2 scraps I had from Basic Grey's What's Up 6x6 pad
step 2

Step 3: Cut 2 small pieces of your patterned paper and tape one over her skirt and one over her shirt portion. Don't worry about it over hanging. Make sure your tape doesn't cover where her skirt or shirt will print. Now put the paper back into your printer and print it again. If you are stamping, you will want to stamp your image on each piece of patterned paper.
step 3

This is what you will have:
step 4

Step 4: Cut your printed/stamped images out.
step 5

Step 5: Color her in and attach her shirt and skirt. I left the envelope there because we will cover it later.
step 6

Step 6: Stamp bench onto card and stamp another onto masking paper.
Step 10

Cut out the bench from the masking paper. It peels off like so:
step 11

Step 7: Grab 2 more pieces of patterned paper scraps and hand cut or die cut a tree. One for the top and one for the bottom. I used my Silhouette to cut mine. My green scrap had some swirls stamped on it too. Feel free to stamp on any of your patterned papers.
step 13

Step 8: Die cut some clouds. I used my Big Shot for these.
step 8

Step 9: Place bench mask and cloud masks on the card front where you would like them. Use the tree also to help you compose your card.
step 14

Step 10: Ink up your card. I used Distress ink in Tumbled Glass and Broken China. Don't worry about the masks turning blue...they are supposed too.
step 16

Step 11: Peel off your masks. Color your bench, die cut and stamp some grass if you want. I also stamped some puppies and kittens, colored with Copics and fussy cut them out.

Step 12: Assemble card. **NOTE I bent Lovely Emma a little at the waist and then I bent her a bit at the knees and crossed her legs (I did it after I photographed it) and glued her toes down. I also only pop dotted her head to make it look more like she was sitting.
I also put a cat in her lap to cover the envelope (remember I said we were going to do that?)
close up crossed legs

Here is a close-up of the grass. I stamped it once on the card and then stamped it on cardstock, colored it and cut it out. I attached the cut out layer with pop dots to give the grass dimension.

close up grass

That's it. Very simple. Very little patterned paper and a good use of a digital image.

I hope you play along with us. I will be back at 11:00 p.m for another challenge so please stop by later to see that card. I promise it's much less steps. ;)

Here are the official rules to join the challenges:

THE RULES:
Have lots of fun!
Challenge projects must be NEWLY created and follow the challenge prompt.
You DO NOT have to use SP stamps on your projects - anything goes for supplies.
ONE online crop challenge per project, no piling on crop challenges.
You can enter each challenge as many times as you would like.
All entries are due by Monday, March 11th at noon EST.
One winner will be chosen at random from all the challenges for a mystery prize package.
One winner who enters the most challenges will win a mystery prize package.
One winner will be chosen at random from all the comments left on the Online Crop comments on Facebook or on the Online Crop blog posts. This winner will also win a mystery prize package!

Until next time....
Michelle